Headshot Lighting: Essential Setups for Flawless Portraits
Professional headshot lighting is key for an impactful image that shows your best features. People form impressions in the first 7 seconds, so a great headshot is essential. Use setups like one-light, two-light, and natural lighting techniques to enhance your appearance.


Powerful lighting setups and the right equipment are the recipe for a professional headshot. The right headshot lighting can highlight your best features and portray your confident demeanor. A recent university study introduced the “7/11 rule,” revealing that people form 11 impressions about you in the first 7 seconds. A standout headshot with well-crafted lighting helps you seize those few critical seconds.
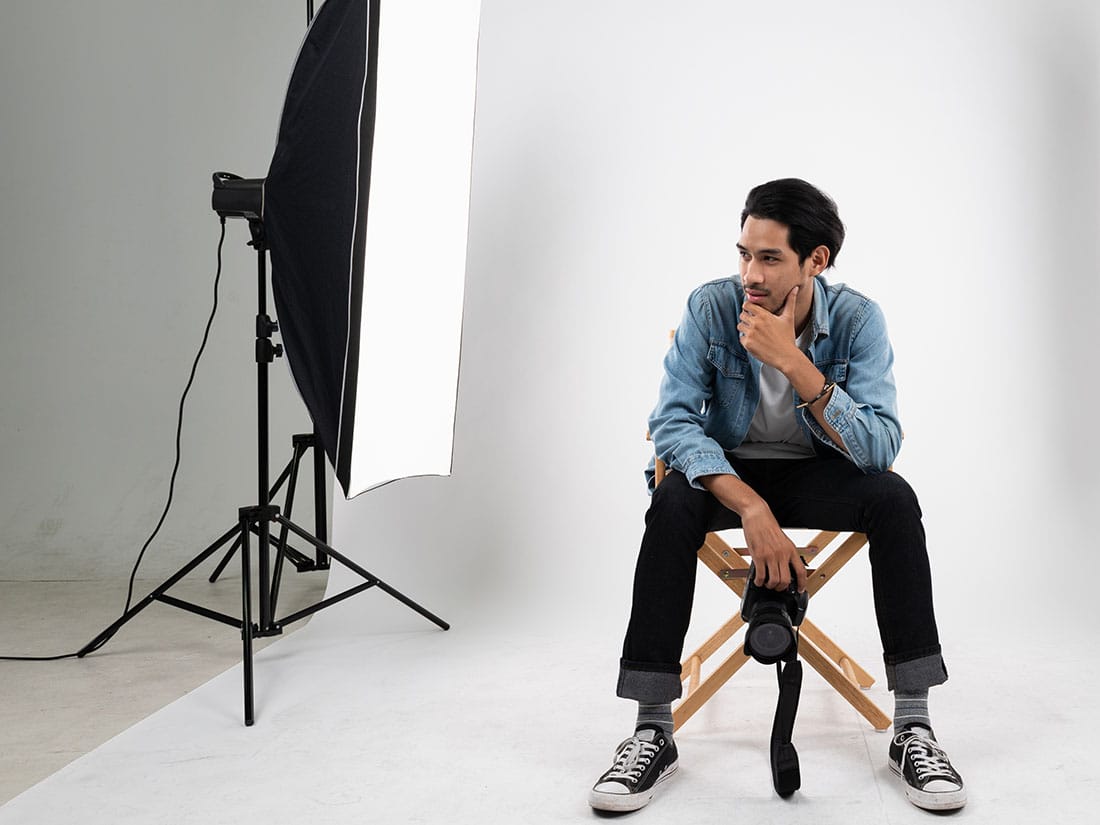
Whether you’re a realtor, freelancer, or event manager, the quality of lighting in your headshot instantly allows you to appear approachable, confident, and polished. Lighting is the secret sauce for a quality headshot. Imagine this — minimized shadows, vibrant skin tone, and shining rim or backlight light. Sounds like the perfect setup for a professional headshot, eh? Without a doubt, professional headshot lighting enhances your natural features, adds warmth or authority to your presence, and ensures that your image looks vibrant and professional.
If you’re new to this, figuring out the lighting can seem tricky, but don’t worry—we’re here to guide you through the basics and help you create a standout headshot that makes a lasting impression. Let’s get started!
Why Is Lighting So Important in Headshot Photography?
Professional headshot lighting plays an important role in capturing your best features and creating a long-lasting impression. For instance, a vibrant and professional headshot on platforms like Behance or Notion will make you appear more approachable and likable while shaping the right impression for potential clients and securing more opportunities. Let’s dive into how it works:
The Impact of Lighting on Headshots
Below are major areas emphasized by high-quality lighting:
- Mood and Atmosphere: While soft and diffused light can create a warm and homely feel, high-contrast lighting can create a dramatic and intense effect.
- Facial Features: With proper lighting, you can accentuate the subject’s most prominent features and highlight them in the best possible way.
- Depth and Dimension: Lighting is crucial for creating depth and setting the dimension of the headshot. Photographers can add shadows and highlights while controlling the placement and intensity of light.
- Professionalism and Credibility: Whether you’re networking or job hunting, the right headshot lighting can make a significant difference. For example, a dramatic, shadowed headshot might suit an early-stage startup entrepreneur, while natural, even lighting is more appropriate for a non-profit worker.
The Basics of Headshot Lighting Setup
Let us check out the basics of headshot lighting:
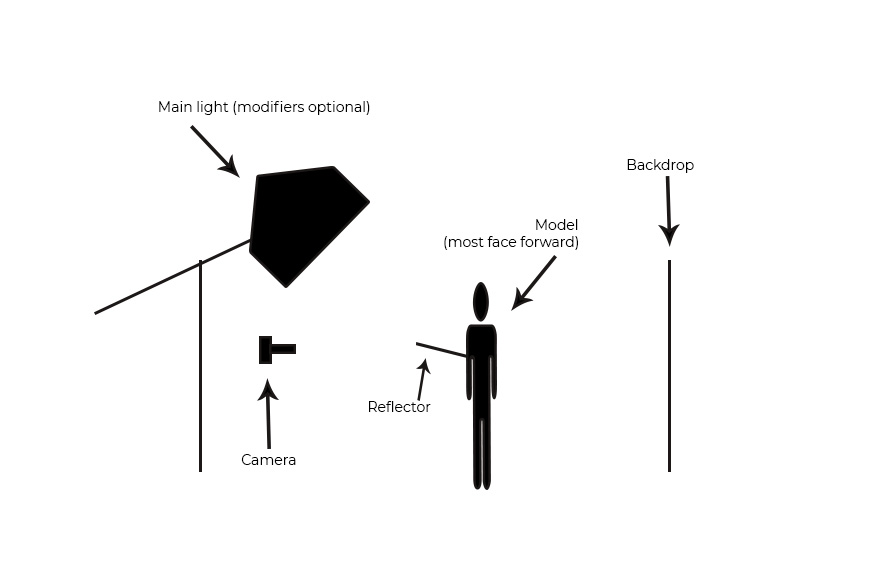
- One Light Setup for Headshots: The one light headshot setup involves positioning the light at the right angle. It is a simple headshot lighting setup and an effective way to create visually stunning portraits.
- Positioning the Light
While you can experiment with different angles for dynamic effects, the key to success is positioning the light at the right angle. The one light corporate headshots result in a flattering and balancing look.
- Using Reflectors
You can consider using a reflector to soften shadows and add dimension. The reflector will prove to be helpful in bouncing light back to the subject and creating an illuminating effect.
- 2 Light Setup for Headshots: A second light can prove to be useful in filling light or creating a separate headshot background. The two-light headshot setup can also significantly enhance the portrait by providing fill light.

- Key and Fill Light Setup
The 2 light headshot setup involves setting up two lights. The key light helps illuminate the subject’s best features and the fill light is used to soften the shadows. It is typically placed 45 degrees from the subject’s face with the support of a fill light.
- 3 Light Setup for Headshots: A three-light setup offers versatile use and flexible control over the lighting. Its three components are key light, fill light, and hair light (or rim light).
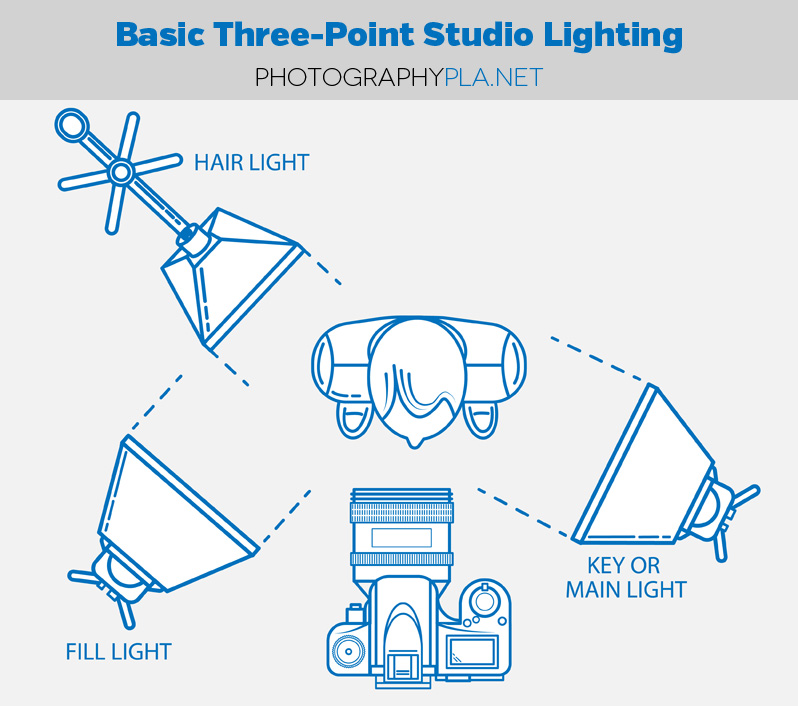
- Components of a three-light setups
- Hair Light (or Rim Light): It is placed behind the subject, creating separation from the background and adding more depth and dimension.
- Fill Light: The second light is often used to soften shadows and add dimension.
- Key Light: It is the main source of light that directly focuses on the subject’s face.
How to light a headshot for different effects?
Below are the most effective lighting setups for corporate headshots or any other types of headshots:
- Signature Light: The ‘signature light’ setup, named by photographer Felix Kunze, uses two strobes. The key light is positioned at a high angle to the camera’s right, creating soft, directional light. The second strobe, aimed at a white wall or reflector, fills in shadows, providing balanced and gentle lighting.
- Split Lighting: This technique places the light opposite the subject, creating a dramatic contrast with one side of the face brightly lit and the other in shadow. It enhances facial contours and adds intensity to the portrait or headshot.

- Butterfly Headshot Lighting Setup: This is the best choice for a business headshot lighting setup. It features a key light, placed above the subject while pointing down at their face at a 45-degree angle. This results in an even shadow effect on both sides of the face and a small shadow under the nose resembling a butterfly.
With different lighting techniques, photographers create dynamic effects for the desired mood boards. You can also consider using clamshell lightning, outdoor natural lighting, punchy kick lights, timeless light, and power lights as your professional lighting setup.
Natural Light Headshots: Tips and Tricks
For stunning natural lighting headshots, consider replicating the effects of natural portraits such as the golden hour, skylight, shade, or cloudy days. Wondering how you can create a natural sanctuary while shooting indoors? Let us take a closer look at each technique:
- Golden Hour: It represents one hour after sunrise or one hour before sunset when the light is soft and warm. To mimic this effect, use warm-toned bulbs and position your subject facing the light at a low angle for a soft, warm glow. It results in a flattering, gentle glow that enhances your subject’s features.
- Shade: Shooting in the shade provides diffused, even lighting without harsh shadows. To recreate this, use diffusers on your lights to soften the illumination and avoid direct light. Position your lights to mimic the gentle, indirect light found in shaded areas for a smooth, natural look.
- Cloudy Effect: Cloudy days make for soft, diffused lighting with minimized shadows and highlights. To mirror this effect, use multiple lights with diffusers and place them at a lower angle across your subject.
Use Reflectors: Incorporate reflectors to bounce light back onto your subject, filling in shadows and creating a balanced, natural look. Experiment with Angles: Adjust the angle of your lights to find the most flattering positions that mimic natural lighting conditions. Monitor Light Temperature: Ensure your bulbs have a warm tone to replicate natural lighting.
Studio Lighting for Professional Headshots
You don’t have to be a know-it-all or a lighting wizard to click sophisticated clicks. A few basic steps can take you a long way in making your headshots look professional and refined.
Below we’ve listed several basic lighting setups to help you achieve the best clicks:
- Clamshell Lighting: It is a popular technique that involves two lights under a common setup. The photographer places the two lights on either side of the subject. For positioning, the lights are directed slightly above and below the subject’s face. A clamshell lighting for corporate headshots results in soft, even light that is flattering and highlights the best features.
- Rembrandt Lighting: The Rembrandt lighting is named after the famous Dutch painter, who emphasized creating a distinctive triangular shadow to add depth and drama to the portrait.
- High-Key Lighting: This setup involves producing bright yet minimal shadows for focused and clear headshots. High-key lighting involves creating minimal shadows that work best for corporate and fashion photography.
- Low-Key Lighting: The technique allows creating a dramatic and mysterious look that is often used by artists. Low-key lighting involves creating dark shadows for dramatic shots.
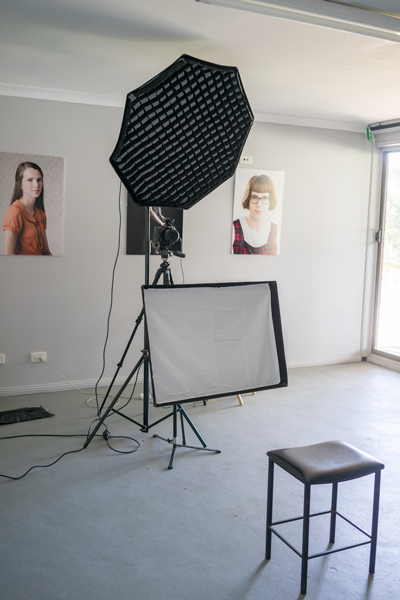
To create a professional headshot, you require lighting equipment and modifiers such as studio strobe lights, softboxes, umbrellas, grids and reflectors. It allows controlling light in a studio environment and achieving high-end headshots.
Corporate Headshot Lighting Setup
Imagine looking for your manager’s headshot on your LinkedIn profile—what is the first thing that you’ll notice upon stumbling over his profile? Profile image. Now, would you expect a blurry selfie taken after meeting old friends at the nearest club or a clean and focused headshot with a solid background? We are sure you would go for the latter.

But do you know how to create a corporate headshot for yourself? Let us understand more about it.
First things first, you need the right equipment for the lighting setup. Consider looking for tripods, studio strobe lights, softboxes, light stands, neutral backgrounds, and reflectors. Next, you need to set up the perfect corporate headshot lighting. But how?
- Position the background behind the subject to ensure minimal distractions and even shadows.
- Place the main source of light at a 45-degree angle to the subject’s face to create a flattering light.
- Fill in shadows with a second light; place it slightly lower than the key light. You can also consider adding a hair light to create separation from the background.
- Adjust the lighting and experiment with different angles to achieve the desired effect.
Don’t forget to use a tripod for a stable base and avoid harsh shadows. Also, pay attention to details such as the subject’s hair, makeup and expressions. Use high-end photo editing software for the desired final look.
DIY Headshot Lighting: How to Achieve Professional Results at Home
Are you a freelance graphic designer looking to set up a DIY headshot lighting setup at home? With a bit of creativity and some budget-friendly equipment, you can achieve professional-looking results without breaking the bank. Start by gathering essential items like softboxes, diffused lights, light stands, reflectors and a tripod to keep your camera steady. Softboxes and portable lights can be found online or at local photography stores, while you can use solid sheets or cardboard as reflectors.
Now, find a well-lit spot in your home with minimal distractions. Set up your light stands and experiment with angles to get the most flattering light for your headshot. Place your softbox or portable light to achieve even illumination, and use a reflector to fill in any shadows for a balanced look. Set your camera on the tripod and test different angles and lighting setups until you find the perfect combination. Consider asking a friend or family member to help with the setup and adjustments.

Frequently Asked Questions
- What is the best lighting setup for headshots?
The best headshot lighting setup uses a three-point system: a key light at a 45-degree angle for primary illumination, a fill light to soften shadows, and a backlight to add depth and separation from the background.
- How do I set up lighting for a professional headshot?
For a professional headshot, experiment with different angles, distances, and light modifiers to create an illusion of focused yet minimal lighting.
- What is clamshell lighting and how is it used in headshots?
Clamshell lighting is a popular lighting setup involving two lights, positioned above and below the subject. It is used to create a soft, illuminating headshot.
- Can I take professional headshots with natural light?
Yes, you can take a professional headshot with natural light. Consider setting up during the golden hour (right before sunset or right after sunrise) or on cloudy days for soft and diffused lightning.
- How do I achieve a good headshot lighting setup at home?
You can achieve a good headshot lighting setup at home using natural light and high-end equipment such as a tripod, reflectors, light sources and softboxes.
- What equipment do I need for studio headshot lighting?
For studio headshot lighting, you need studio lights, light modifiers, a tripod, softboxes, umbrellas and reflectors.
So, are you ready to stun the crowd with your perfect headshot?
We have got you covered!
Welcome to InstaHeadshots, your AI-driven solution for exceptional headshots. Create your professional image effortlessly and conveniently from the comfort of your own home. Yes, no travel is required. Also, it’s completely weather-proofed for your convenience!
Why Choose InstaHeadshots?
It is perfect for you and your friends as it offers:
- Outstanding Reviews: Our clients rave about the quality and professionalism of our work.
- Superior Quality: We deliver high-quality headshots that capture your unique personality and professionalism.
- Competitive Pricing: Get exceptional value with our competitively priced packages.
- Stress-Free Experience: Enjoy a seamless, comfortable experience right from your home, without worrying about the weather or travel.
- Customizable Packages: We offer a range of packages tailored to fit your specific needs and budget.
Contact Us:
Got questions or need more information? Our friendly team is here to help. Reach out at help@instaheadshots.com.
Don’t Wait! Get Your Perfect AI Generated Headshots Today.